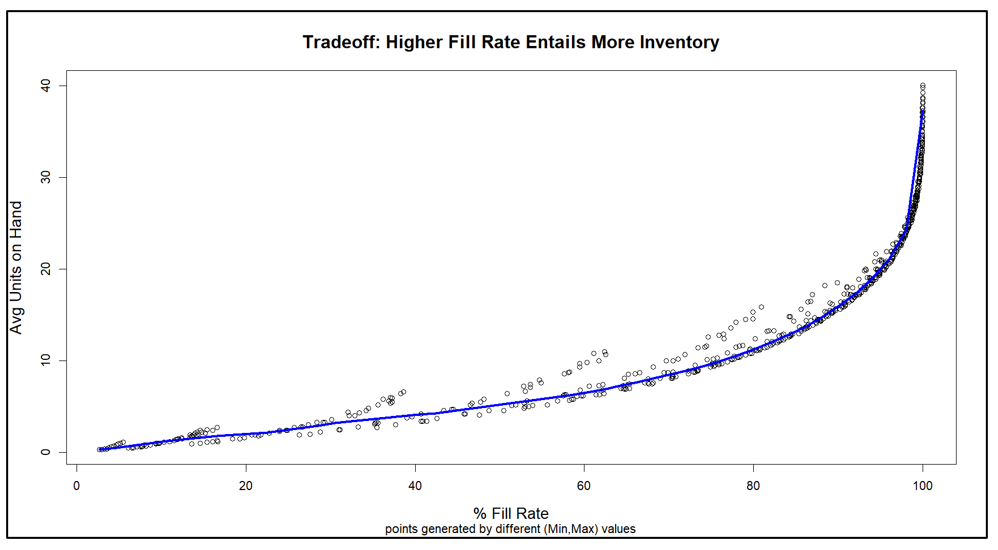
Figure 3 Tradeoff curve between Fill Rate and On Hand Inventory
Figure 3 Tradeoff curve between Fill Rate and On Hand Inventory
 Learning from Inventory Models
 Irregular Operations
 Smart Software to Present at Epicor Insights 2024
 Irregular Operations
 The Cost of Spreadsheet Planning
 Finding Your Spot on the Inventory Tradeoff Curve